
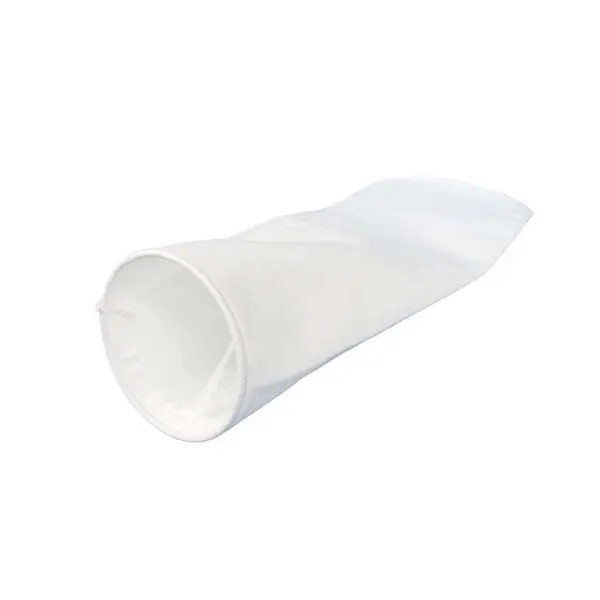
How To Repair The Failing Filter Bag
No matter how good your filter bags are, they will eventually fail. A small hole, a broken seam, or a worn spot can turn a well-performing dust collector into an emission violation machine.
The good news? Not every failing bag needs to be replaced immediately. Many problems can be repaired on-site, saving you weeks of waiting and thousands of dollars.
In this guide, we will show you how to identify, repair, and prevent filter bag failures — using tables and step-by-step instructions.
1. First, Know the Signs of a Failing Filter Bag
Before you can repair a bag, you need to know it is failing. Here are the most common signs:
| Sign | What You See | What It Means |
|---|---|---|
| Visible dust at stack | White or grey smoke from chimney | Bag leak or hole |
| High pressure drop | Collector gauge reads higher than normal | Bag clogging or blinding |
| Low pressure drop | Gauge reads lower than normal | Large tear or bag off the cell plate |
| Dust in clean air chamber | Dust layer inside the clean side | Leaking bag or bad seal |
| Frequent pulse cleaning | Controller cycles too often | Dust is not releasing from bag surface |
| Hole or wear spot | Visible damage during inspection | Mechanical abrasion or chemical attack |
💡 Tip: Inspect your bags at least every 3–6 months. Catching a small problem early is much easier than replacing a whole set.
2. Can It Be Repaired? A Quick Decision Table
Not all failing bags can be repaired. Use this table to decide:
| Condition | Repairable? | Best Action |
|---|---|---|
| Small hole (< 1 cm / 0.4 inch) | ✅ Yes | Patch or plug |
| Medium hole (1–5 cm) | ✅ Yes (temporary) | Stitch or patch |
| Large tear (> 5 cm) | ❌ No | Replace bag |
| Broken seam or stitching | ✅ Yes | Re-stitch or patch |
| Burned or melted area | ❌ No | Replace bag |
| Chemical brittleness (fabric crumbles) | ❌ No | Replace bag |
| Worn cuff (top ring) | ✅ Yes | Replace cuff or patch |
| Abrasion hole from cage | ✅ Yes | Patch + fix cage |
| Blinding (dust locked in fabric) | ❌ No | Replace or deep clean (sometimes works) |
⚠️ Important: Repairs are often temporary. Always plan to replace a repaired bag at the next scheduled shutdown.
3. Tools and Materials You Will Need for Repair
Keep these items in your maintenance shop:
| Tool / Material | Purpose |
|---|---|
| Patch material (same fabric as bag) | Cover holes |
| High-temperature silicone plug | Seal small pinholes |
| Needle and high-temp thread (PTFE or Nomex®) | Sew small tears |
| Heat-resistant adhesive or patch tape | Quick temporary repair |
| Scissors | Cut patch material |
| Flashlight | Inspect bags |
| Marker | Mark damage location |
| Gloves | Safety |
| Replacement cuff (if available) | Fix top ring damage |
✅ Best practice: Keep a roll of self-adhesive PTFE patch tape in your toolbox. It works for most small holes and tears.
4. Step-by-Step Repair Methods (With Tables)
Method 1: Repairing a Small Hole (< 1 cm)
| Step | Action |
|---|---|
| 1 | Locate the hole by shining a flashlight from inside the bag |
| 2 | Clean the area around the hole with dry cloth |
| 3 | Cut a patch 2–3 cm larger than the hole |
| 4 | Apply high-temp adhesive or use self-adhesive patch tape |
| 5 | Press firmly and hold for 30 seconds |
| 6 | Let adhesive cure per manufacturer instructions |
Estimated time: 10 minutes per hole
Expected life after repair: 1–3 months
Method 2: Repairing a Medium Hole or Tear (1–5 cm)
| Step | Action |
|---|---|
| 1 | Remove the bag from the collector |
| 2 | Clean the damaged area (use compressed air) |
| 3 | Cut a patch that extends 5 cm beyond the tear on all sides |
| 4 | Sew the patch to the bag using high-temp thread (stitch pattern: dense zigzag) |
| 5 | Apply heat-resistant adhesive over the stitching |
| 6 | Reinstall the bag carefully |
Estimated time: 30 minutes per bag
Expected life after repair: 2–6 months (if done well)
Method 3: Repairing a Broken Seam
| Step | Action |
|---|---|
| 1 | Remove the bag |
| 2 | Turn the bag inside out to expose the seam |
| 3 | Remove old loose threads |
| 4 | Re-stitch the seam using high-temp thread (double stitch recommended) |
| 5 | Apply a thin strip of patch tape over the repaired seam |
| 6 | Turn bag right side out and reinstall |
Estimated time: 20 minutes per seam
Expected life after repair: 3–6 months
Method 4: Temporary Repair Without Removing the Bag (Emergency)
Use this method when you cannot stop production:
| Step | Action |
|---|---|
| 1 | From the clean air chamber, locate the leaking bag |
| 2 | Clean the bag surface around the hole (if reachable) |
| 3 | Insert a high-temp silicone plug directly into the hole |
| 4 | OR press a self-adhesive PTFE patch over the hole from outside |
| 5 | Mark the bag for permanent repair during next shutdown |
Estimated time: 5 minutes per hole
Expected life after repair: A few days to a few weeks
⚠️ Warning: Temporary repairs are for emergency only. Do not rely on them for long-term compliance.
5. What Not To Do – Common Repair Mistakes
| Mistake | Why It Is Wrong |
|---|---|
| Using regular duct tape | Melts at high temperature, makes a bigger mess |
| Patching with different fabric | Different thermal expansion → patch falls off |
| Ignoring the root cause | Hole will come back if cage or wear point is not fixed |
| Repairing a chemically damaged bag | Fabric is already weak; repair will not hold |
| Using too much adhesive | Can block adjacent pores, increasing pressure drop |
| Not marking repaired bags | You forget which bags need replacement later |
6. When Repair Is Not Enough – Replacement Indicators
Sometimes, repairing is a waste of time. Replace the bag if:
| Indicator | Action |
|---|---|
| More than 5% of bags have holes | Schedule full set replacement |
| Same bag repaired 3 times | Bag has reached end of life |
| Fabric feels brittle or crumbles | Chemical damage — no repair works |
| Bag age exceeds 24 months (standard fabric) | Natural fatigue |
| Emission limit is very strict (<10 mg/Nm³) | Repaired bags usually leak slightly |
💡 Rule of thumb: If you spend more than 30 minutes per bag on repairs, replacement is cheaper.
7. How to Prevent Failures So You Need Fewer Repairs
Prevention is always better than repair. Use this table to check common failure causes:
| Failure Type | Most Common Cause | Prevention |
|---|---|---|
| Hole from abrasion | Bent or rusty cage | Inspect cages every bag change |
| Hole at bottom | High inlet velocity or missing wear sleeve | Install venturi or wear sleeves |
| Burn hole | Spark or high temperature spike | Install spark arrestor or cooling system |
| Broken seam | Poor stitching quality | Buy from reputable supplier |
| Chemical failure | Wrong bag material for gas | Analyze flue gas before buying |
| Cuff damage | Improper installation | Train installers |
8. Quick Reference Card – Repair vs. Replace
Print this table and keep it near your dust collector:
| Situation | Action |
|---|---|
| Small hole, bag age < 12 months | ✅ Repair |
| Medium tear, bag age > 18 months | ❌ Replace |
| Broken seam, bag otherwise good | ✅ Repair |
| Burned or melted fabric | ❌ Replace |
| Brittle fabric | ❌ Replace |
| Hole near cuff | ✅ Repair (if cuff is good) |
| More than 3 holes in one bag | ❌ Replace |
| Emergency, cannot stop production | ✅ Temporary repair (then replace soon) |
Final Summary
Repairing a failing filter bag can save you time and money — but only if you do it correctly and for the right situations.
Key takeaways:
- Small holes and seam breaks are repairable
- Burned, brittle, or chemically damaged bags are not repairable
- Always use high-temperature materials (PTFE tape, Nomex® thread)
- Temporary repairs are for emergency only
- Prevention (good cages, correct material, proper installation) is better than any repair
Need help with bag repair? Send us a photo of your damaged bag. We will tell you if it can be repaired — and if so, the best method to use.